Did you just finish building your favorite LEGO set and don’t know where to display it?
Or maybe you just bought a new set you’re going to build later, and are wondering where to store it?
In this article, I’m going to show you exactly where to display LEGO sets — plus a few important tips you need to know about keeping them safe, dust-free, and looking awesome.

Table of Contents
What To Do With LEGO Sets Once Built?
Once you finish building a LEGO set, you can display it proudly. Later, you may choose to disassemble it if you’re running out of space or want to rebuild something else.
If you do disassemble them, it helps to keep the pieces organized. Sort them and store them properly — and always keep the original LEGO boxes because they’re valuable and might come in handy.
Where To Display LEGO Sets
Here are 10 creative ways to display your completed LEGO builds:
1. LEGO Wall
Mount a few floating shelves on a wall in your bedroom, playroom, or any free space. You can space them out and arrange your favorite sets for a fun, visual showcase.
Make sure the shelves are strong enough to support your heavier sets.
2. Display Case
A glass display case is a great way to show off your collection while protecting it from dust. This setup makes for a nice conversation piece when you have guests over.
3. Glass Cloche
For elaborate or special sets, a glass cloche can be a very decorative and elegant way to keep them on display — and safe.
4. DIY Floating Shelves
If you’re into DIY projects, you can create custom floating shelves that match your room style and give you flexible space for different LEGO themes or sizes.
5. Create LEGO Shelves
Get creative and build small shelves using actual LEGO bricks. This is a fun and unique way to display smaller sets, especially in a child’s room.
6. IKEA Bookcase with Glass Doors
Have a big LEGO collection? Convert an IKEA bookcase with glass doors into the ultimate LEGO display unit. It works well for larger sets and entire collections.
7. Sliding Shelves
Use a bookcase with sliding shelves to create LEGO scenes and slide them away when not in use. Great for combining display with space-saving storage.
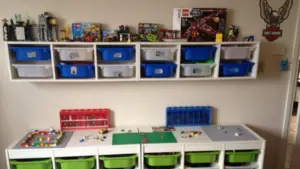
8. Underbed LEGO Table
An underbed LEGO table allows you to store and display your sets while keeping them accessible for play. Perfect for kids or limited space.
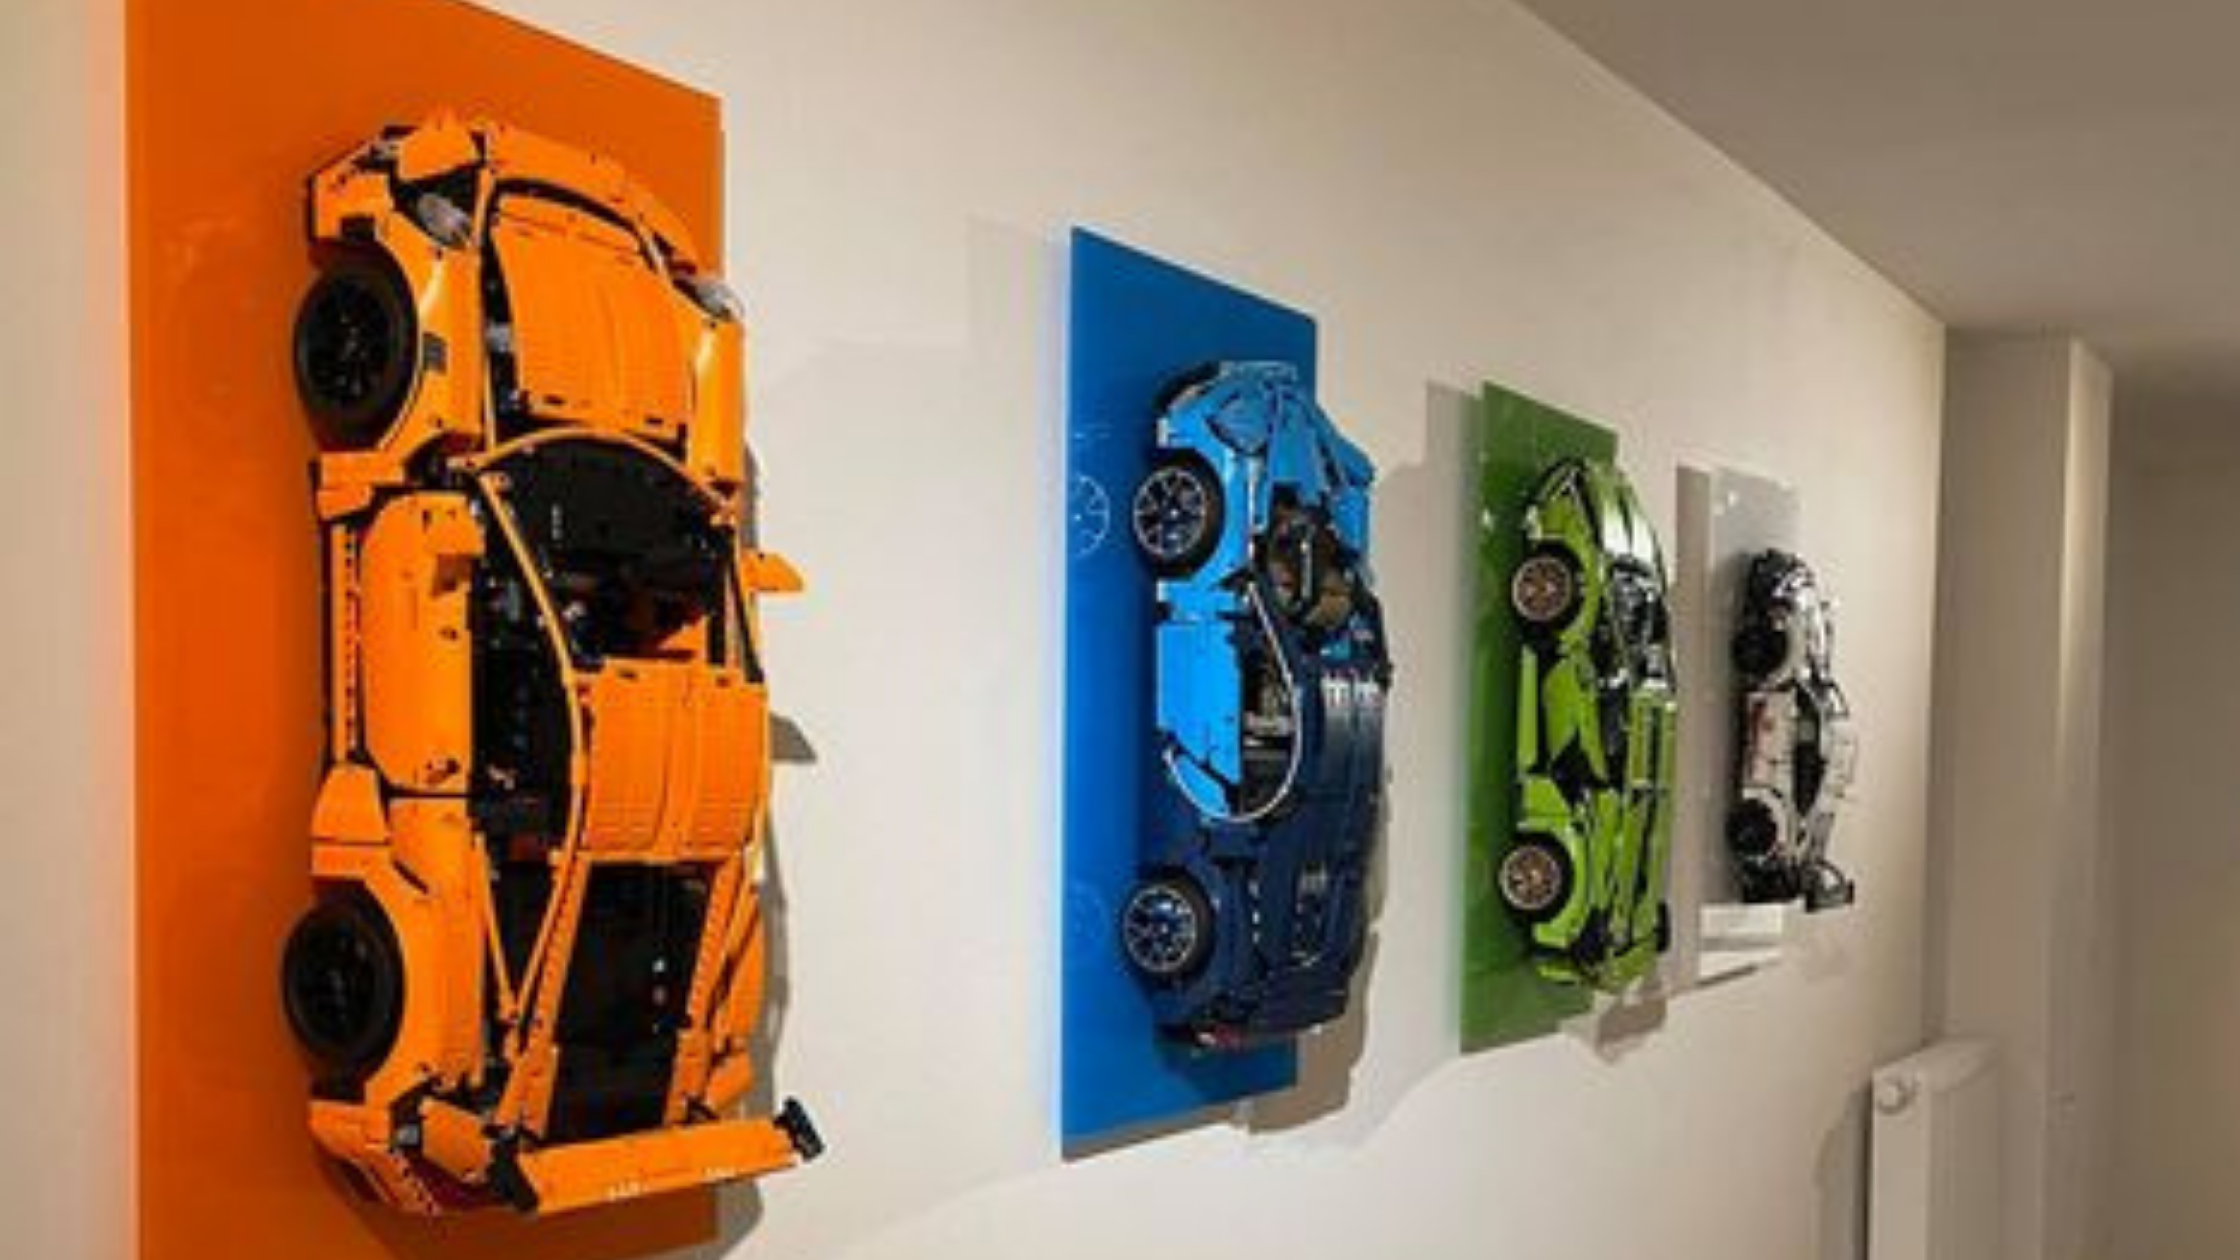
9. Wall Mounting with Wire
You can mount a LEGO set directly on the wall using wire and a screw. Here’s a quick step-by-step guide:
Materials:
-
Craft wire or malleable metal wire
-
Wire cutter or scissors
-
Drywall anchor, screw, and drill (if mounting into drywall)
Steps:
-
Flip the set over and locate two technical pinholes.
-
Cut a piece of wire about 3x the length between the pinholes.
-
Thread the wire through both holes and twist tightly 10–12 times.
-
Cut off excess and ensure the twist is flush and tight.
-
Mount a screw to your wall (use anchors for heavy sets).
-
Hang your set using the wire — done!
10. Mini Display Units
Smaller desktop display units are perfect for showcasing mini LEGO builds on desks, shelves, or bedside tables.
Read Also: Best Way to Display LEGO Saturn V: 5 Cool Ideas!
What Is The Best Way To Display LEGO?
The best ways to display LEGO sets include using:
-
Floating LEGO walls
-
Glass door bookcases
-
Display cases or units
They keep your sets safe, clean, and visually appealing.
How To Display LEGO Sets On The Wall
You’re going to need three things:
- Craft wire or malleable metal wire. The stronger the wire, the more reliable they’re going to stay on the wall.
- Wirecutter (you can use scissors) depends on the strength of the wire that you have.
- Drywall anchor, a screw, and a drill if you’re going to be drilling into drywall.
Step 1: Put a wire at the bottom of the set
- Flip the set over and identify two technic pinholes towards the front of the set
- Take your wire and measure about 3x the length of what it would be from pinhole to pinhole
- Cut the wire and start putting it through the technic pin holes on the bottom
- Bend the end of the wire so that you can put it in between the side of the LEGO set and the technic pinhole in the bottom, so we’re going to feed that through this pinhole right
- Push the way through to the other end, you might need to re-bend the wire so that it can feed back up through in between the pinhole and the side of the LEGO set
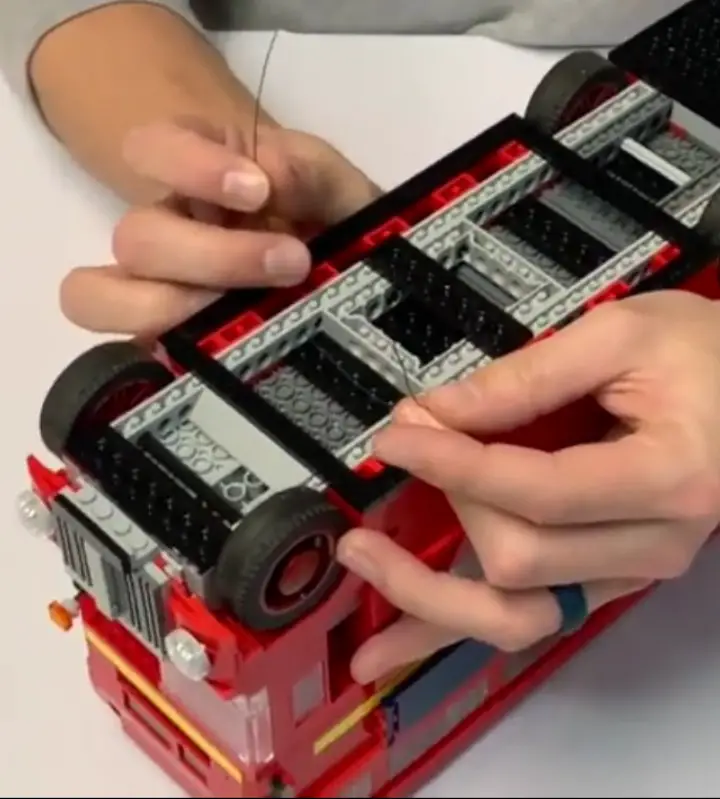
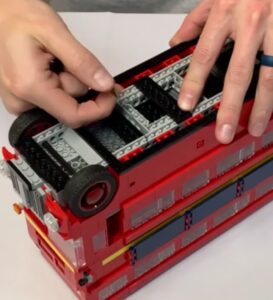
- Once you’ve got both strings together, twist them even on each side anywhere from 10 to 12 times
- Make sure you twist a lot so that it stays secure. However, you may not need to twist as much if you have a stronger wire.
- Use your scissors to cut off the excess once you’ve finished twisting it
- Once it’s folded down flush, give it a good pull to make sure that it’s in there securely, because you don’t want your LEGO set falling off the wall
- That’s it. Now let’s move to step two
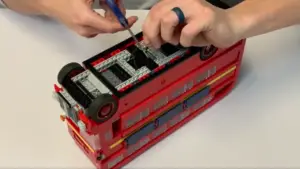
Step Two: Mounting your LEGO set to the wall
This is straightforward.
- Mount your screw directly on the wall
- If you’re using drywall, you’re going to use a drywall anchor and a drill to make it much more secure, especially for those heavy LEGO sets
- You can probably just drill the screw straight into the wall. What you’ll usually have to do is hold your finger on the string or the wire, and kind of just guess in the pas,t and just drill the hole straight in
- Now since you’ve put the wire on the bottom of the LEGO set, you just simply hang it up on the screw and that’s it
There you go, that’s how you mount a LEGO set to the wall.
Read Also: Saturn V vs Eiffel Tower: Which is Best for Display?
How to Display LEGOs
Final Thoughts
There are tons of fun and smart ways to display your LEGO sets once built — from walls and display units to bookcases and even DIY LEGO shelves.
When you run out of space, take them apart, sort the pieces properly, and store them in bags or boxes for the next awesome build.